Sunday, November 30, 2014

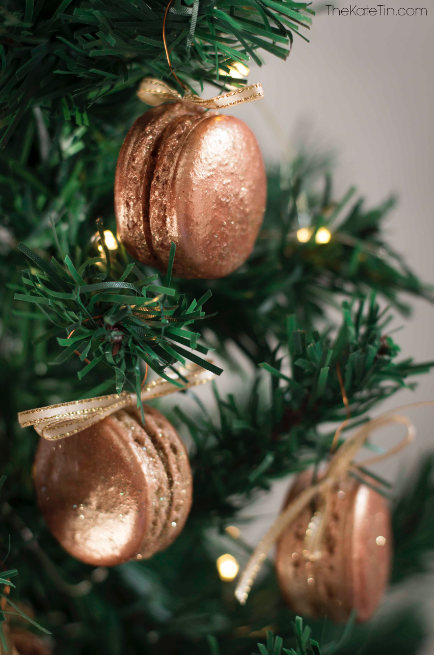
Gingerbread macaron Christmas tree decorations

Why buy Christmas tree ornaments when you can make them yourself, and then eat them?! This was the very epiphany I had last week when after moving into a new house I suddenly realised I had nothing to decorate a tree with (in my spring-cleaning chuck-everything-away state they were tossed in the bin). But if you're a baker, who needs glass/plastic baubles when you can make your own which coincidentally look and ARE good enough to eat. My infatuation with macarons continues this year (I tried to convince you all last year to give them a bash with this Christmas mince pie macaron version) with my spiced gingerbread macaron - which I might add, if Christmas had a taste, would taste like this! And with the beautiful edible copper, gold and silver dusts and glitter you can buy these days, it's super easy to add sparkle to your tree. Hang them up and after Christmas dinner, when the family asks where's dessert? Channel your inner Heston Blumenthal and just point to the tree!


I know macarons are daunting but I've tested this recipe so many times I can recite the quantities and it works every time. My five crucial points to success are:

1. Grind and sift the almonds and icing sugar thoroughly
2. Beat the egg whites until very stiff - they should form very stiff peaks. 
3. Fold until the mixture looks like lava - it should ooze when dropped from your spoon. 
4. Check your oven temperature! 
5. Bake on the lower third rack of your oven. 


Gingerbread macaron Christmas tree trinkets
Makes about 30

120g ground almonds
200g icing sugar

1 tsp ground ginger

1 tsp mixed spice
100g egg whites (about 3 large eggs)
1/4tsp cream of tartar
35g castor sugar

Spiced white chocolate ganache
110ml cream
peel of 1 orange
1 tbsp ground ginger
1 tsp mixed spice
250g good-quality white chocolate, chopped

Edible copper or gold dust and glitter, for dusting

Line 2-3 baking sheets with good-quality baking paper or even better, silicone sheets. Using a tot glass, trace circles onto the baking paper then flip it over – you’ll need these as a sizing guide (unless your piping skills are of Martha Stewart quality!)

Blend the almonds, icing sugar and spices together until fine. Sift the mixture to remove any clumps then blend any leftover mixture and sift again until nothing remains. 

Begin beating the egg whites and cream of tartar on low speed. Once the egg whites are very foamy and white, begin sprinkling in the sugar as you beat. Increase the speed to medium, if necessary, and beat the meringue to very stiff glossy peaks. The meringue should be very firm.
Add about 1/4 of the almond/sugar mixture and fold until no streaks remain. Continue to add the almond mixture in quarters, folding until incorporated. The mixture should be a lava consistency so when dropped, it should start spreading and oozing. 
Spoon the batter into a piping bag and pipe rows of batter onto the baking sheets using the circles as a guide, giving them enough space to spread. Tap the pan on the counter to bring up any air bubbles and quickly pop them with a toothpick if necessary. 
Allow the cookies to rest on a level surface for 30-60 minutes until they are no longer tacky to a light touch. This is a very important step so don't be tempted to be impatient!
While they rest, place an oven rack in the lower 3rd of your oven and preheat to 150C (conventional oven, if fan-forced, reduce by 20C). Check your oven isn't too hot or too cold by using an oven or sugar thermometer.
Bake the cookies for 16-20 minutes. They’re ready when you lightly touch them and they no longer have any ‘give’.


Make the ganache by heating the cream and orange peel together until just simmering. Set aside for 1 hour to infuse before heating again and pouring over the white chocolate. Stir until melted then mix in the spices and allow to set until spreadable.
Sandwich the macarons together with the ganache. Using a clean soft paint brush, coat the macarons with edible copper or gold dust. 

TIP To turn the macarons into tree decorations, insert a long piece of wire with a hook at the top into the macarons while sandwiching them. Allow to set before hanging them up with ribbon or thread.  

Monday, November 24, 2014

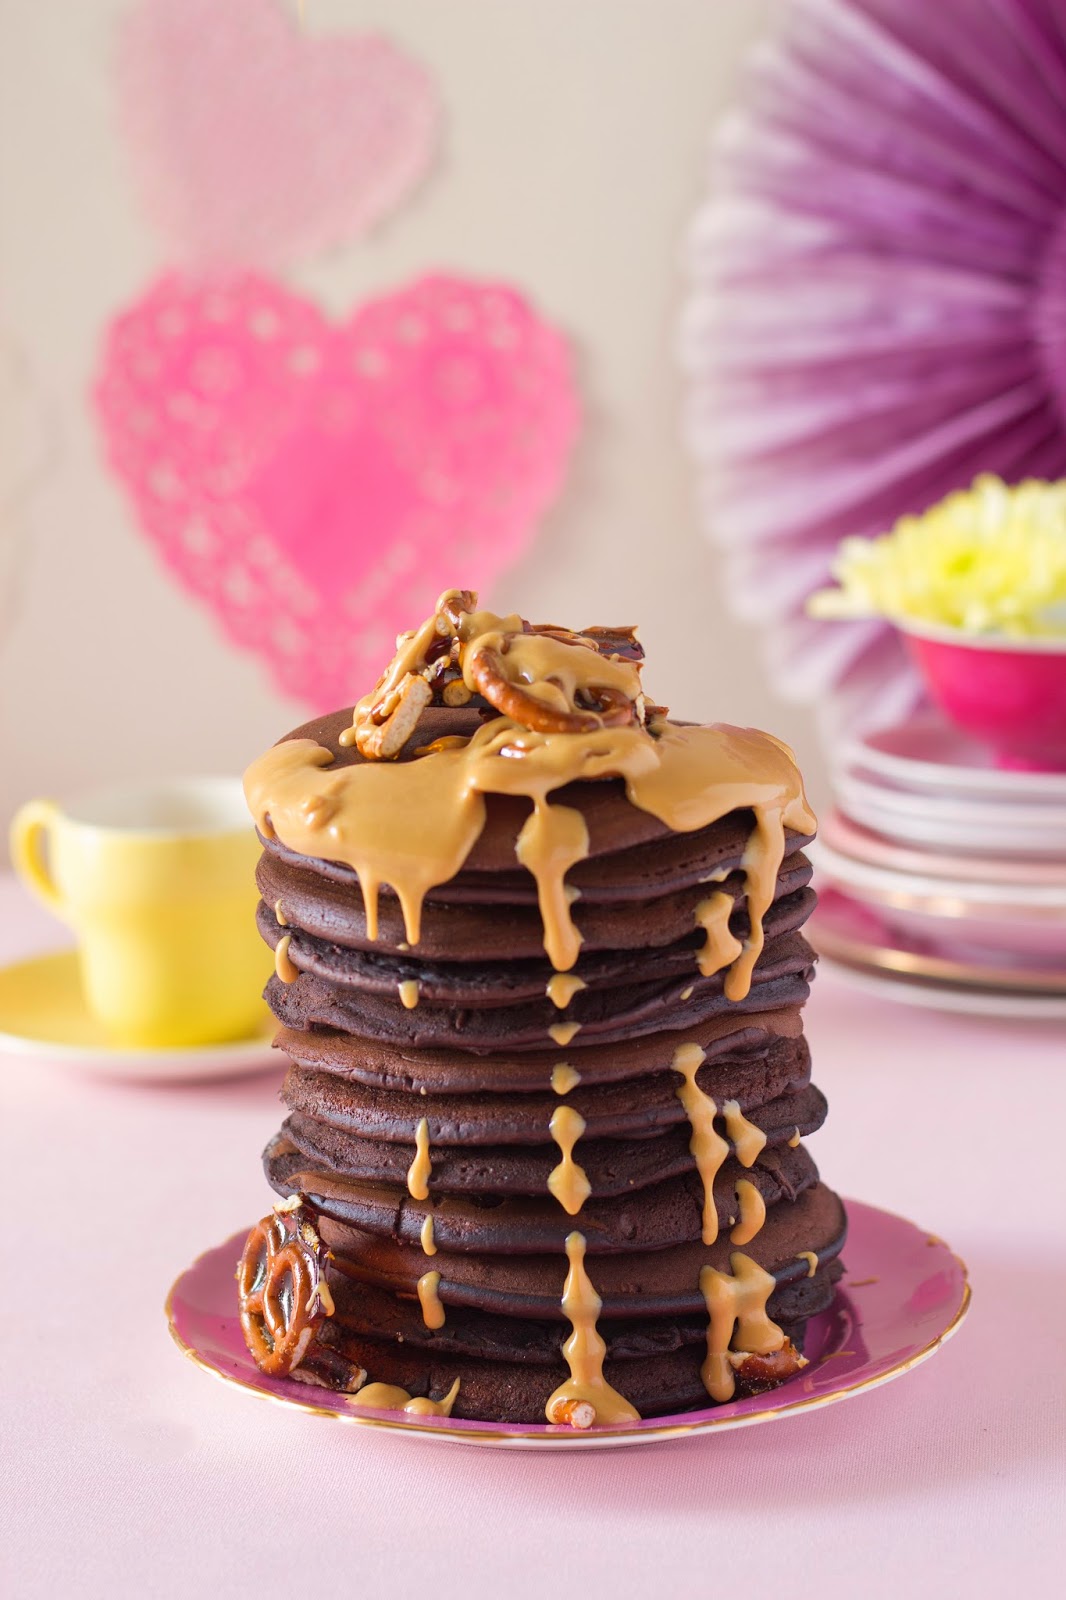
Chocolate brownie flapjack stack with pretzel brittle and peanut butter sauce

Let's be honest here, we'll use any excuse to have dessert for breakfast. The person who decided muffins were an okay way to start the day? Genius. I mean, you're eating cake for breakfast, people! Just without the frosting. And somehow it's now healthy for you?  That person deserves a high five! 

Now if we're going to be eating cake for breakfast, then sneaking a little chocolate into flapjacks (or pancakes or crumpets or whatever you choose to call them) is perfectly acceptable. And since I'm the one coming up with this recipe, well then you won't be surprised that I threw in some pretzel brittle (salted pretzels drenched in caramel) and a little (okay a lot of) peanut butter sauce just for funzies. Because who said breakfast had to have restrictions? Lunch and dinner don't have to deal with this kind of stereotyping!

An oozey gooey decadent tower of breakfast deliciousness!
 The flapjacks are basically little round brownie blobs - moist, dense and rich, which goes perfectly with the salty-sweet peanut butter and pretzels. And I even put your morning cup of coffee IN the flapjack. Who's the genius now? 

Mile-high chocolate brownie flapjack stack with pretzel brittle and peanut butter sauce
Recipe created for Food and Home Entertaining Magazine
Makes 12-15

200g sugar
200g cake flour
100g cocoa powder
7.5ml (1/2 tbsp) baking powder
pinch of salt
1 egg
125ml (1/2 cup) buttermilk
5ml (1 tsp) vanilla extract
160ml hot black coffee
30g smooth peanut butter
60g butter, melted

Pretzel brittle
100g salted pretzels
200g sugar

Peanut butter sauce
1 cup  (250ml) creamy peanut butter
60ml (1/4 cup) peanut oil
60ml (¼ cup) icing sugar, sifted
pinch of salt

To make the brownie flapjacks, mix all the dry ingredients together. Whisk the eggs, buttermilk and vanilla and add to dry ingredients. Combine coffee, peanut butter and butter and add to the mixture. The mixture should be of a dropping consistency.
Heat a non-stick pan and grease thoroughly. Drop spoonfuls of the batter into the pan. When bubbles start to form on the surface, flip the flapjacks over and cook on the other side for 1-2 minutes. Repeat with the remaining batter.
To make the brittle, scatter the pretzels on a nonstick baking mat or baking paper. Place the sugar in a saucepan with ¼ cup water and heat gently until sugar is dissolved. Bring to the boil and simmer until the sugar turns a deep caramel. Remove from the heat and immediately pour over the pretzels. Allow to set. Break into pieces.
To make the sauce, combine all the ingredients together and stir until smooth.
Serve the flapjacks piled high on top of each other, sprinkled with pieces of brittle and drizzled with peanut butter sauce.

Monday, November 10, 2014

Neapolitan Ice Cream Cake


They say you can't buy happiness, but you can buy ice cream. And that's sort of the same thing isn't it?! Well how about buying the ingredients to create this spectacular show-stopper of a beauty guaranteed to bring you happiness. This ice cream cake is so ridiculous easy to make I should be embarrassed for even sharing it. But I'm not. 


This recipe combines two of my childhood memories; I'm sure I'm not the only one to remember licking melted dribbles of artificially-flavoured strawberry, vanilla and chocolate ice cream off my fingers. And of course, the ice cream had to be served in those hideous pink cones! 
The other childhood memory is trips to Milky Lane for soft serve - which meant an award for best parents for mom and dad!  I would sit and swoon over the intricate ice cream cakes that were made to order - if you managed to score a Milky Lane ice cream cake for your birthday party then you were the luckiest kid ever. 

 Despite the kitsch-ness that we associate with Neopolitan ice cream, it actually has a far more dignified history. Invented in Italy (Naples to be exact) it was apparently first made up of the colours of the Italian flag - pistachio, vanilla and cherry! Over time, pistachio and cherry (sadly!) got ditched for the more popular chocolate and strawberry. I've subbed the chocolate layer for a brownie base but if that's too much effort, then go for chocolate cake, crushed chocolate biscuits or even just good ol' chocolate ice cream!


Serves 10-12

300g dark chocolate, roughly chopped
150g unsalted butter
2 tsp vanilla
150g caster sugar
3 eggs, beaten
75g plain flour
2 tbsp cocoa powder
1 tsp salt

1L vanilla ice cream, softened
1L raspberry, strawberry or mixed berry sorbet, softened
Chocolate sauce, to decorate
Fresh raspberries, frozen, to decorate

Preheat the oven to 180C.
Line a 20cm spring form cake tin with baking paper.
For the brownie base, melt 200g chopped chocolate, butter and vanilla together in a heatproof bowl, set over a saucepan of barely simmering water, making sure the surface of the water does not touch the bowl. Remove from the heat and stir in the sugar, then leave to cool for a few minutes.
Beat in the eggs, then sift in the flour, cocoa and salt and fold in until the mixture is smooth and glossy. Stir in the remaining chocolate. 
Pour the mixture into the prepared tin and level the top.
Bake in the oven for 25 minutes, or until the top starts to crack but the centre remains gooey.
Turn off the oven and leave the brownies inside for a further 5 minutes before removing.
Leave to cool completely in the tin. Loosen with a palette knife, clean the tin and place the brownie base back in the cake tin.
Spread over the softened sorbet and place in the freezer to set.
Top with softened vanilla ice cream and and freeze until set.
Remove from the mould, top with chocolate sauce and decorate with raspberries.